Another zoom area cannot be added
The current editor supports one zoom area per step. Resize or move the existing area.
DemoFast tutorial
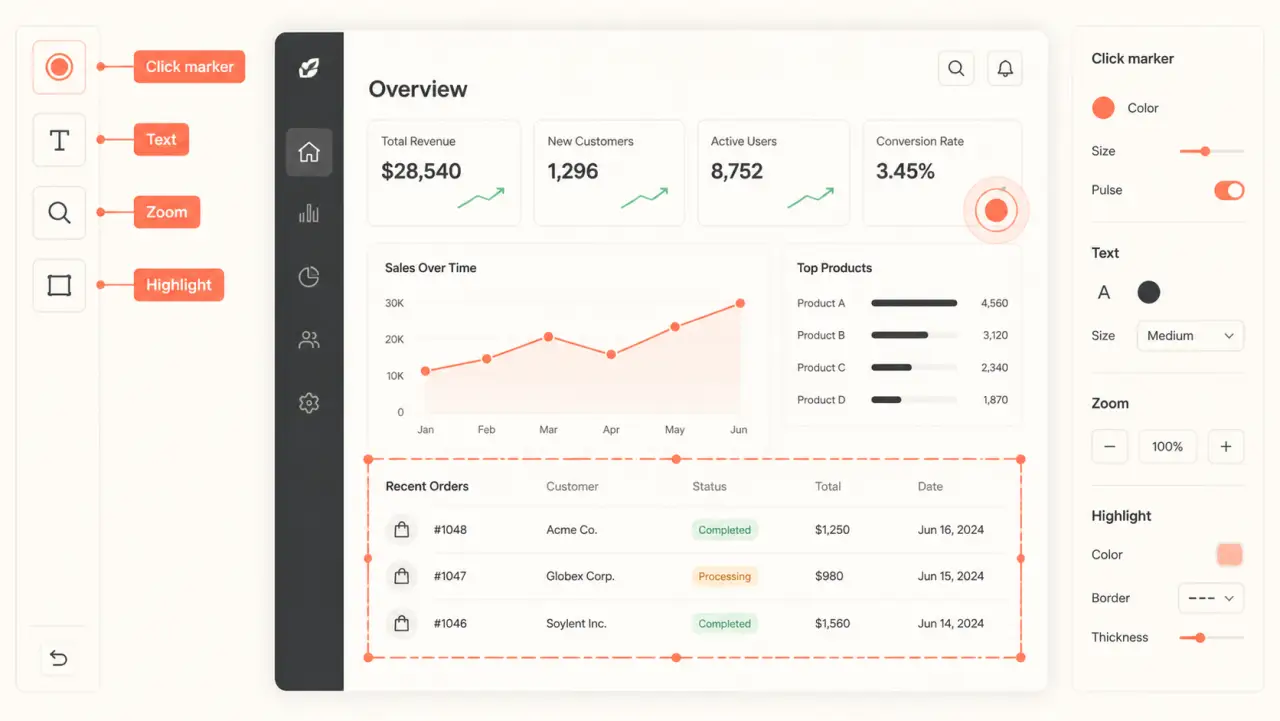
Direct attention to a dense interface with a resizable custom area or a single zoom area on the selected step.
Before you begin
Step by step
Select the step and identify the smallest area the viewer must inspect.
Choose Custom Area in the toolbar, move the rectangle over the region, and resize it from its handles.
Select the area to adjust the available border, fill, and emphasis settings.
Choose Zoom Area, position and resize it over the detail, then use the editor's zoom preview to test the result.
Save and preview. Make sure the zoom supports comprehension and does not disorient the viewer.
Troubleshooting
The current editor supports one zoom area per step. Resize or move the existing area.
Use a tighter area or create a separate captured step at the needed scale.
Related product guide
Choose the lightest annotation that makes the step clear.